
In the Desktop Menu, select File>Import>File.
Stop Motion Animation - Step-by-Step Tutorial
Index | PlugItIn
| FireItUp | Record
| Playback | Saving
| Editing | Sound
| Titles | Output
QT | Output Tape
6 Editing / Combining Clips.
In the Desktop Menu, select File>Import>File.
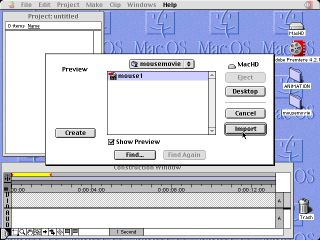
In the Dialog Box, navigate to your Movie Folder and
select a clip.Click "Import".

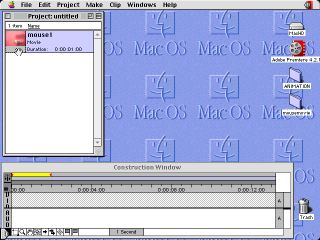
The imported clip will appear in the Project Window.
This is a virtual copy. The real clip will always remain
in your movie folder, unchanged.
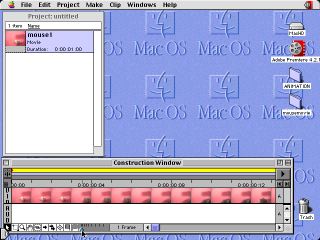
Click, hold and drag the clip from the Project Window
into the Construction Window and drop it on the top
Video Track.

Only a few of the frames in the clip will be displayed.
More frames can be viewed by sliding the Blue Arrow
to the left in the Time Unit at bottom of Construction
Window.
The Time Selector is merely for convenience of viewing
and editing.
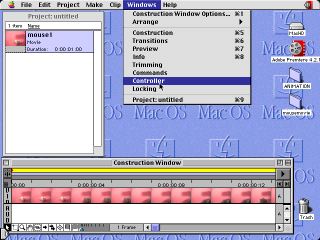
Open the Controller Window.

Play the movie as more clips are imported and added
in the contruction window.
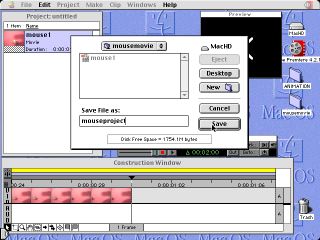
Save the "Project" being constructed to your Movie
Folder. Add the ord "project" to the end of your title
to make it easier to find later among many clip files.
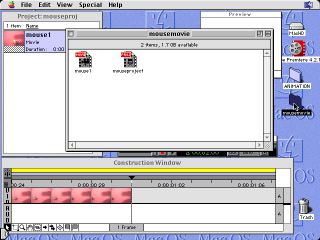
This is what the inside of the Movie Folder looks like
after saving a clip and a project.
Using the Razor Tool to Edit Out parts of a Clip.
![]()
To cut out part of a clip, click once on the 'Razor" tool at bottom of
Contruction Window.
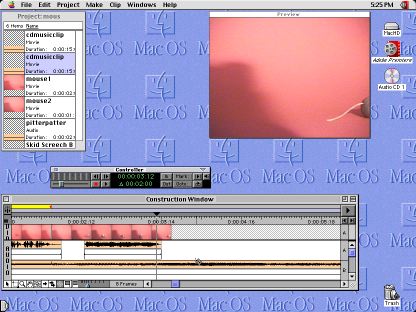
The cursor becomes a Razor. Postition it on a clip, then click once to cut.
(In above picture, Audio Track B is being cut).
It only cuts once. You must reclick on Razor Tool for each additional cut.

After cutting, click once on part to be removed.Then push Delete.

The selected cut part will disappear.Remember- your original clip remains
intact in the MovieFolder. The changes made in the contruction window
and project are all virtual copies of the original.You can always start over.
Index | PlugItIn | FireItUp | Record | Playback | Saving | Editing | Sound | Titles | Output QT | Output Tape